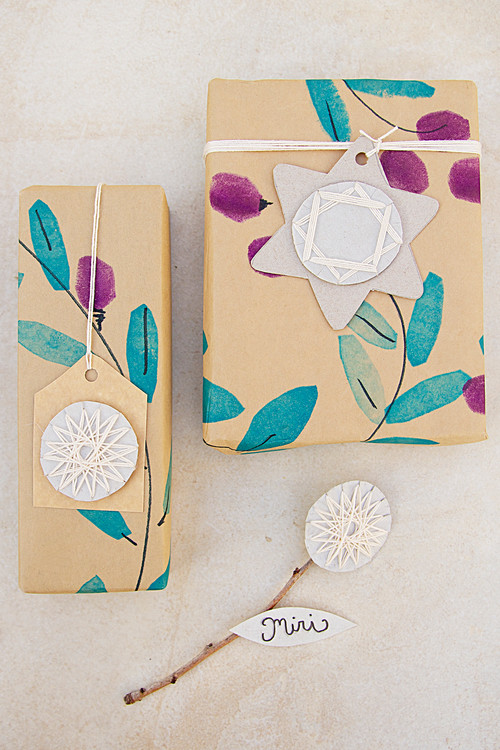
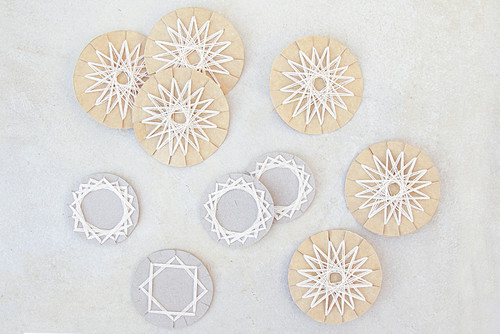
Geometric paper stars, reminiscent of ’70s string art, are woven on circles of cardboard and can be used in fun ways this holiday season. Best of all, they are deceptively simple to make. Create a number of them and fill your home with handmade pieces you can reuse for other special occasions.

a decorative holiday garland.
By creative jewish mom.com Safed

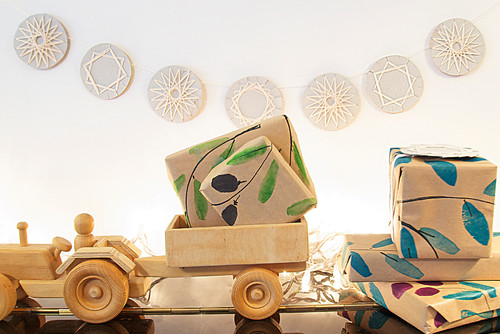
a sweet decorative accessory in a child’s room.
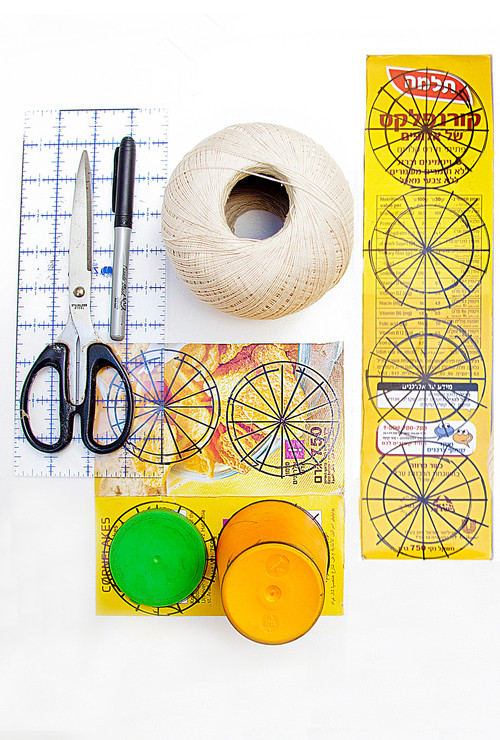
Tools you’ll need
- Recycled cardboard (if you’d like to make a mobile or ornaments, use cardboard that is blank on both sides).
- String.
- Permanent marker or a pencil.
- A ruler (a clear one is ideal).
- Scissors.
- A tapestry needle (or a needle with a large eye).
- Cups or other round objects for tracing – you’ll need two sizes, one of which should be slightly smaller in diameter than the other.
Making the cardboard circles
The larger-diameter cup (or other round object) will determine the overall size of the ornament, while the smaller one will determine the size of the paper stars. If you use a tapered cup, the rim can serve as the larger outline and the bottom as the smaller pattern.
1. Place the larger-diameter cup or other round object on the cardboard and carefully trace around it. Next, centre the smaller-diameter object inside the first circle and trace around it to create the inner circle.
2. Make a dot in the centre of the circle (measure for accuracy) and draw a straight vertical line through the centre to divide the circle in half. Next, draw a horizontal line through the centre to divide the circle into quarters. Then draw two more lines to divide the circle into eighths, and then four more lines to divide the circle into sixteenths. Your circles should look like those in the image showing the tools you’ll need.
If only one side of the ornament will be seen, you can use permanent marker for this step. If both sides will be on display, lightly mark the cardboard with a pencil and erase any visible lines once the star is completed.
3. Using scissors, cut slits on every line just up to the inner circle. Be as precise as possible for the best results.
By creative jewish mom.com Safed
Weaving the string for the paper stars
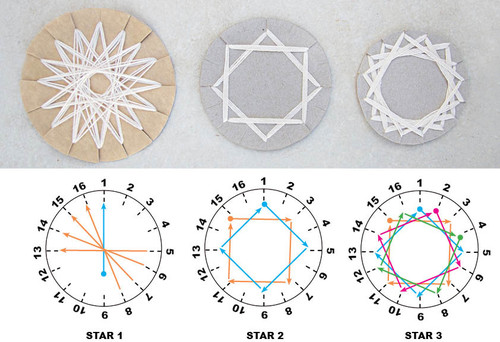
There are many ways to weave stars on a circle with 16 slits. Here are three possibilities to get you started. Start your weaving as directed and weave at least two or three rounds, or more if desired. Fewer rounds are required for thicker string. Once you’ve completed the desired number of rounds, tie the two ends of string together and trim.
Star 1: These paper stars, seen in the previous photo, have a front and a back. These instructions are for weaving from the back and are indicated by the orange arrows on the diagram. To see your progress, simply turn it over.
Place the end of the string in the centre of the circle or let it dangle off the edge of the cardboard. Insert the string in slit one, run it down the back of the circle and through slit eight, then bring it back up on the top side and insert it through slit 16.
Run the string through down the back and insert it through slit seven, then bring it up the front and insert it through slit 15. Continue this pattern until you’ve used all the slits to complete one round.
Star 2: These paper stars look the same on both the front and the back. The instructions here are for stars worked from the front.
The blue arrows on the diagram indicate the pattern and weave direction for the first step.
Place the end of the string in the middle of the back of the ornament and bring it to the front by inserting it through slit one. Run the string across the front of the ornament and insert it in slit five. Repeat the pattern, running the string up the back, through slit one, then across the front to slit five.
Next, run the string across the back and through slit nine, then bring it back up and through slit five. Repeat this pattern once, then run the string up the back from slit nine to slit 13 and back around, repeating once. The final weave is from slit 13 up and through slit one, also repeated. Repeat the entire pattern until you reach your desired thickness.
If the paper stars will been seen from both sides, tie them off and start with a new end. Otherwise, bring the string up through slit 15. Start the next round, weaving the string from slit 15 to slit three to slit seven to slit 11 and back to slit 15, as shown by the orange arrows on the diagram.
Star 3: These paper stars appear the same on the front and the back and are a continuation of Star 2. Follow the instructions for Star 2, and then add two more rounds as indicated in the diagram by the pink and green arrows.
By creative jewish mom.com Safed
Cotton string works nicely with recycled cardboard for a natural look. You can also use metallic or coloured string or embroidery thread to layer different colours in the paper stars. Once you’ve tried these versions, consider making up some of your own patterns for paper stars.

Sara Rivka Dahan 11 December 2018 Houzz Contributor, blogging at www.creativejewishmom.com about a creative life in Northern Israel.
Do you have a question on the local Real Estate market, or should you spend money on your home before you sell, just call Matt Wineera on 0274 951 536 who is always on hand to answer your query.
Check out our Value Plus Real Estate Selling Commission which saves you lots of money when you sell your home with Matt.